Welcome to the new and exciting public preview feature to control Conditional Access policies per SharePoint site.
This feature allow you enforce more stringent access conditions when users access SharePoint sites that have Sensitivity label applied. These more stringent access conditions are enforced when you select a new feature called authentication contextthat has been created and published for your organization’s Conditional Access deployment. These authentication contexts are connected to Conditional Access policies on one hand and on the other hand to resources, as an example a SharePoint site.
Lisensing
You need the following one:
- Microsoft 365 E5
- Microsoft 365 E5 Compliance
- Microsoft 365 E5 Information Protection & Governance
Setup
Step 1: How to setup Authentication Context
Step 2: How connect it with Sensitivity Labels (see licensing section below)
Note: For step 2 the feature is rolling out gradually WW. You may be able to create the label with Authentication Context but when you apply the label the policy may seem to be not enforced. In such case follow the workaround below. Customers who don’t use Sensitivity label can try below approach as well.
Download and install the latest SharePoint Online Management Shell and run the below command for your chosen site. Remove the label from the site.
Set-SPOSite -Identity <site url> -ConditionalAccessPolicyAuthenticationContext –AuthenticationContextName “Name of Authentication Context”
Example
Runthough with my tenant
A. Condiational Access
1. Create a Conditional Access Policy
At first I create a Authentication context (Preview). Attention: only 25 are possible in the Public Preview
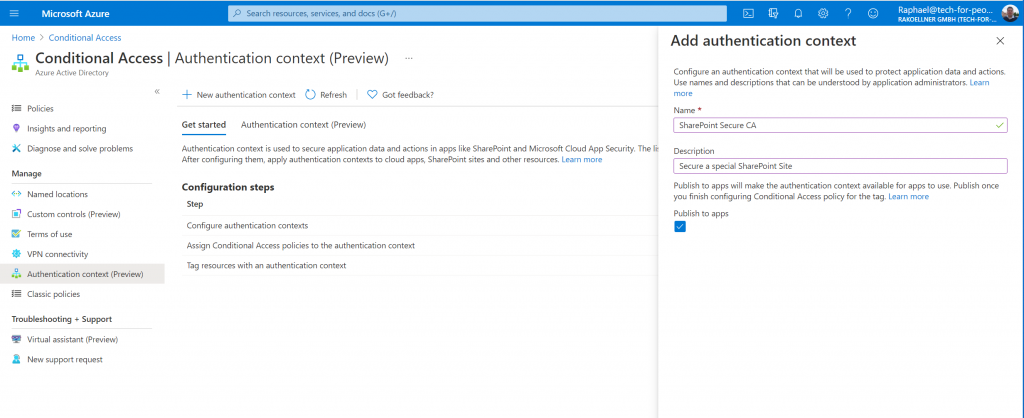
Explain the fields
- Display name is the name that is used to identify the authentication context in Azure AD and across applications that consume authentication contexts. We recommend names that can be used across resources, like “trusted devices”, to reduce the number of authentication contexts needed. Having a reduced set limits the number of redirects and provides a better end to end-user experience.
- Description provides more information about the policies it is used by Azure AD administrators and those applying authentication contexts to resources.
- Publish to apps checkbox when checked, advertises the authentication context to apps and makes them available to be assigned. If not checked the authentication context will be unavailable to downstream resources.
- ID is read-only and used in tokens and apps for request-specific authentication context definitions. It is listed here for troubleshooting and development use cases.
B. Sensitivity Labeling
1. Create a new label with Groups and sites
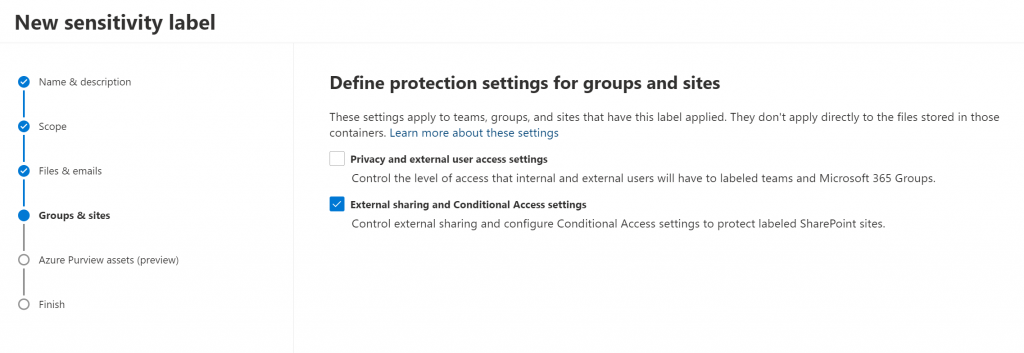
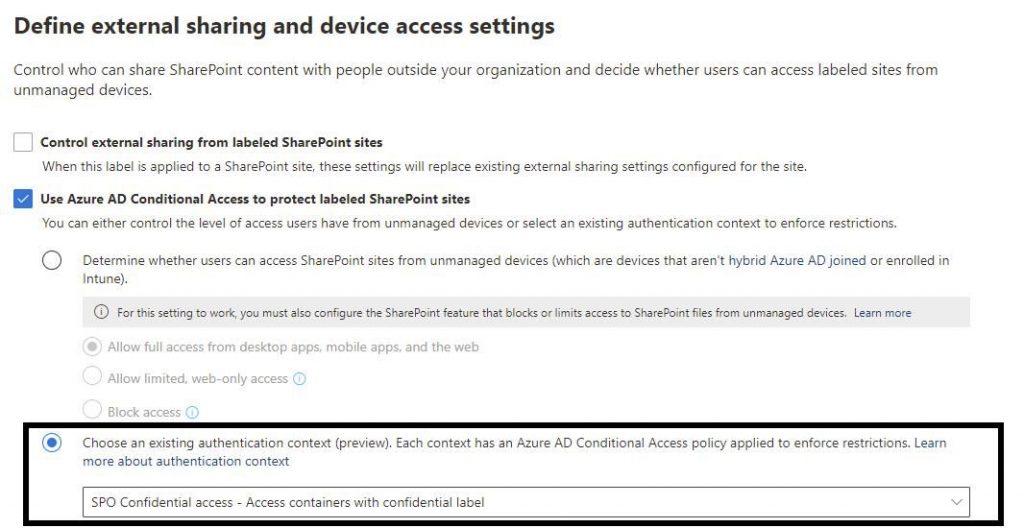
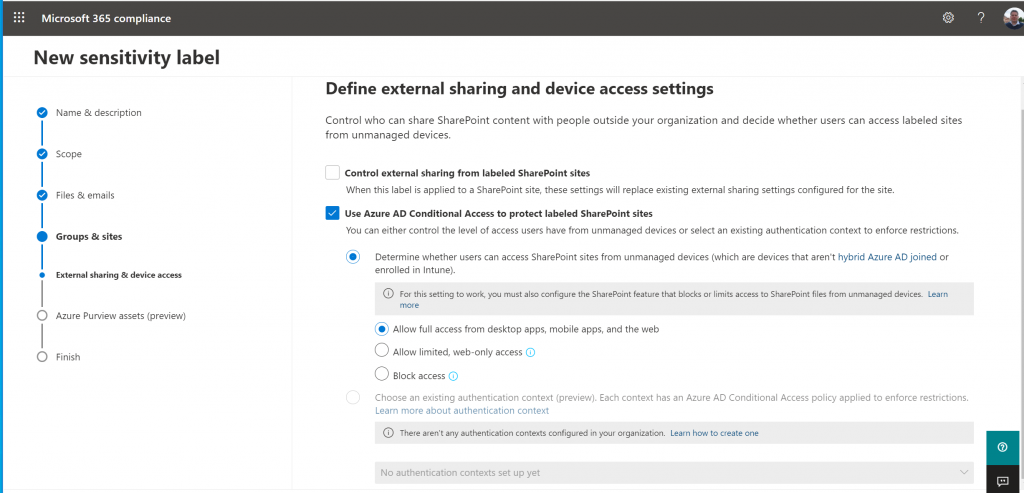
Configure the Azure AD Conditional Access
At first you will see this, when you don´t create a Conditional Access one in the first step.
So I am create a new conditional Access policy and now I can select it:
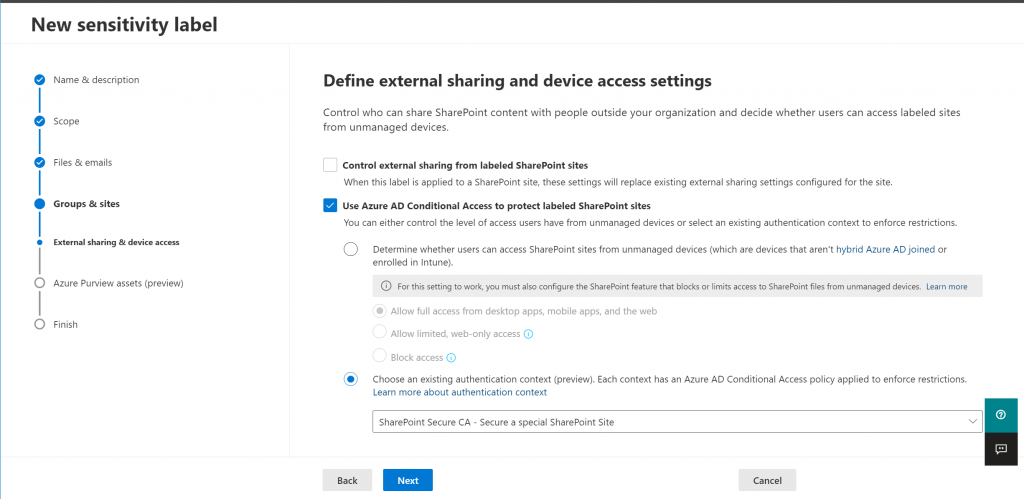
After selecting I create the label.
3. Using via PowerShell and troubleshooting in the Preview
Download and install the latest SharePoint Online Management Shell and run the below command for your chosen site. Remove the label from the site.
Set-SPOSite -Identity <site url> -ConditionalAccessPolicyAuthenticationContext –AuthenticationContextName “Name of Authentication Context”
Via
Granular Conditional Access for sensitive data and actions – Microsoft Tech Community
